January 2016 Archives

Day 11: Zeppelin the Skerry

| No Comments | No TrackBacks
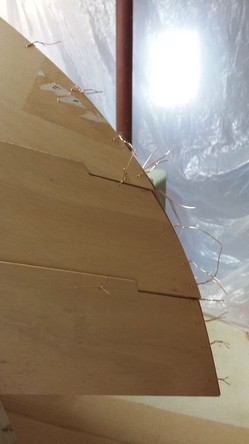
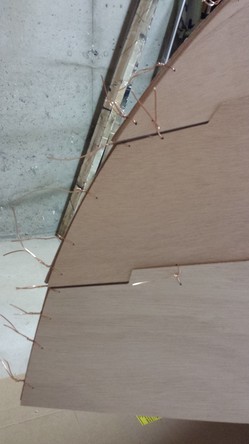
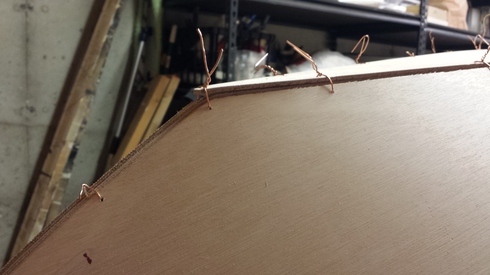
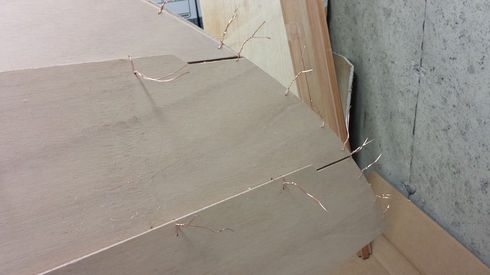
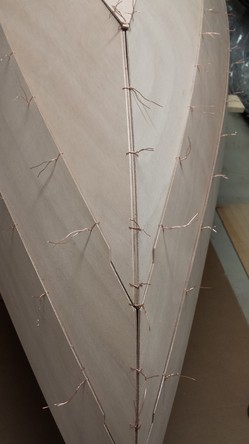
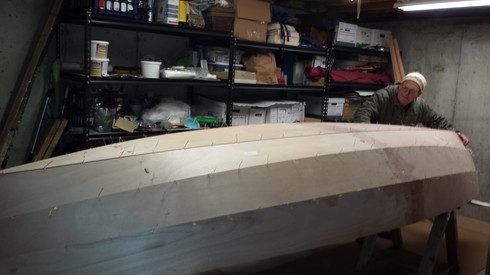
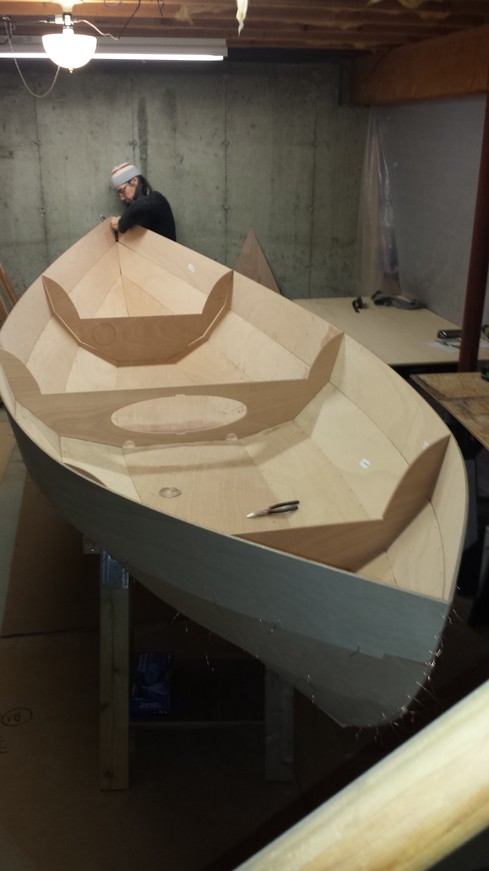
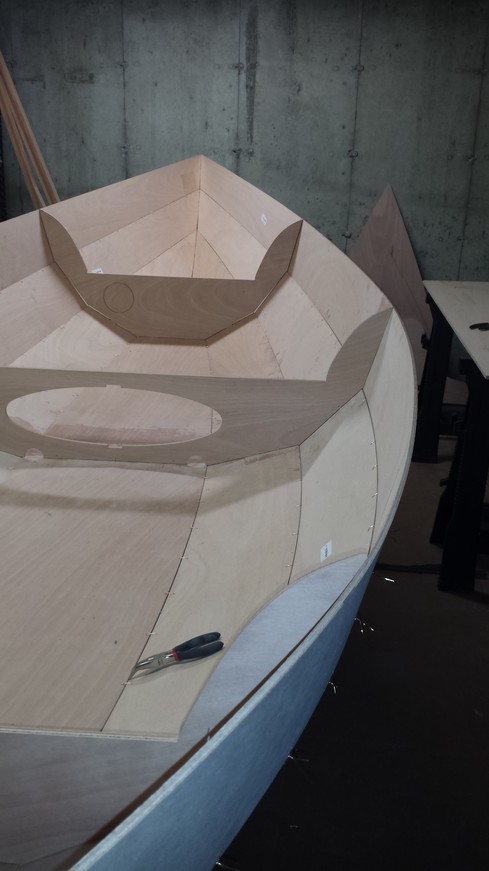
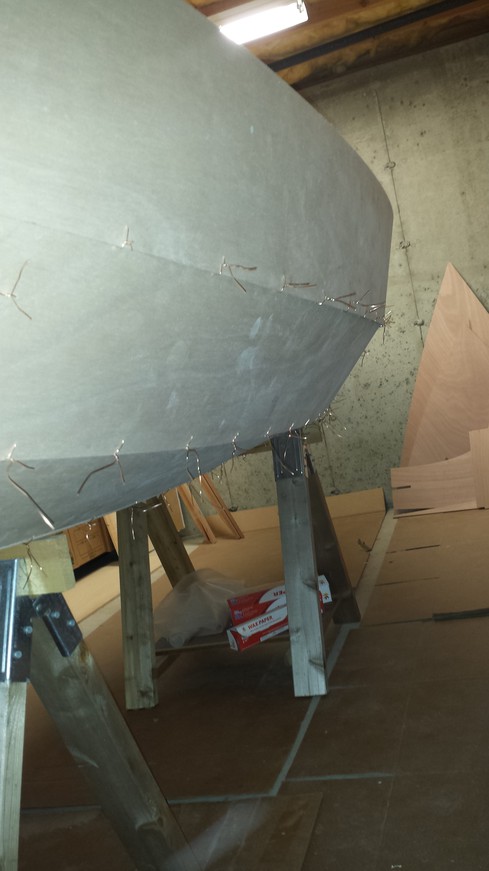
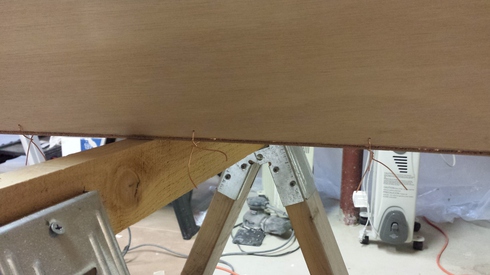
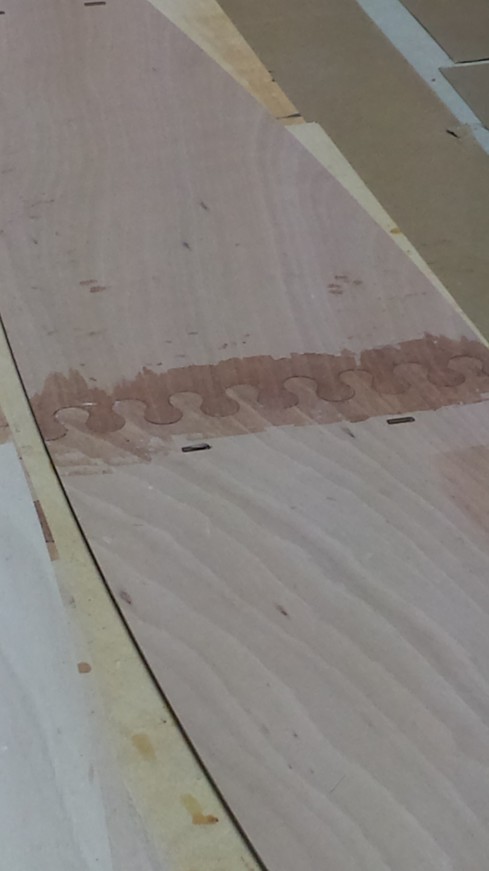
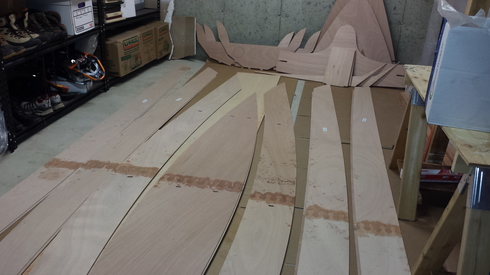
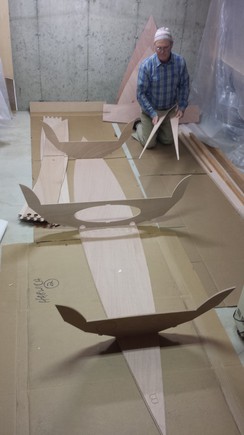
Zeppelin the Skerry progresses.  We have started taking out the stitches.

We received the package of "boat in a box" a few weeks ago.  This is the eleventh day of working on the project.  Tomorrow and the one after will be wait for the epoxy to cure days and we don't count those.

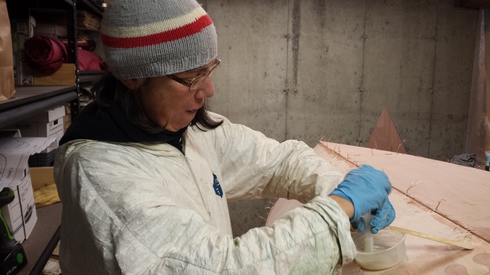
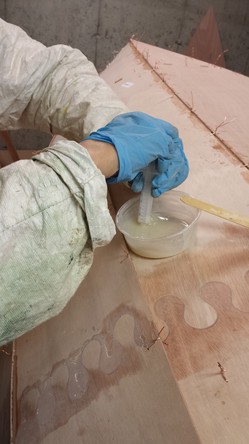
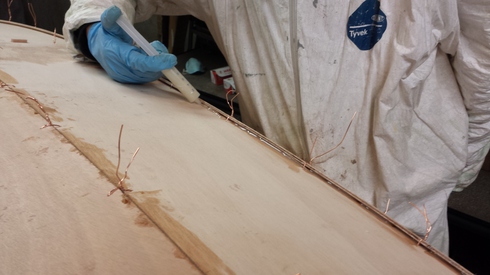
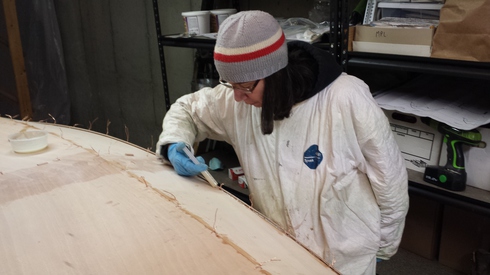
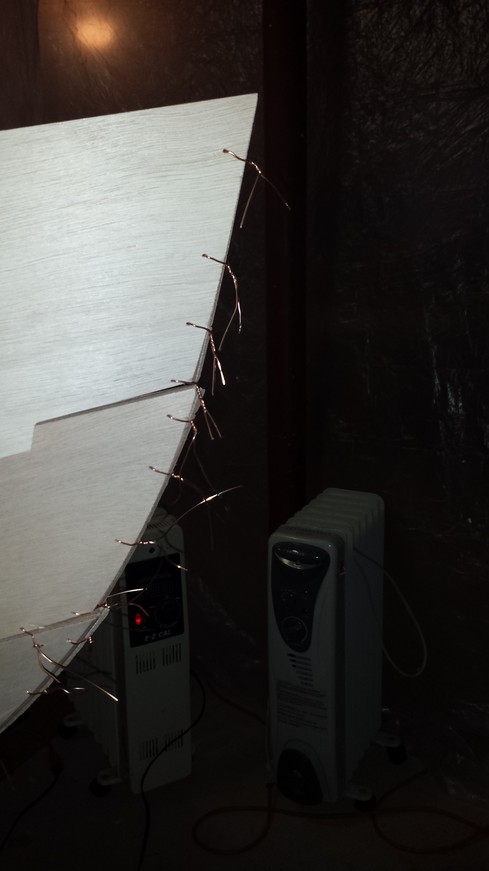
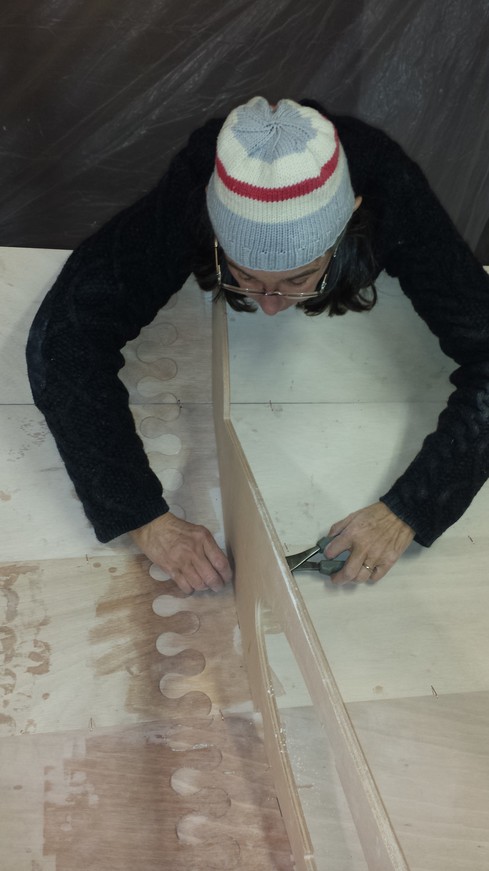
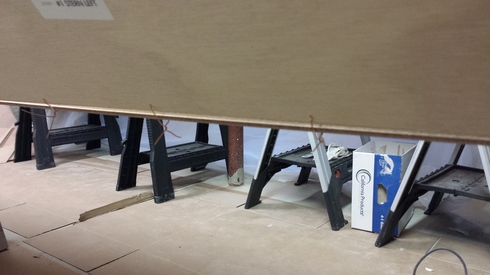
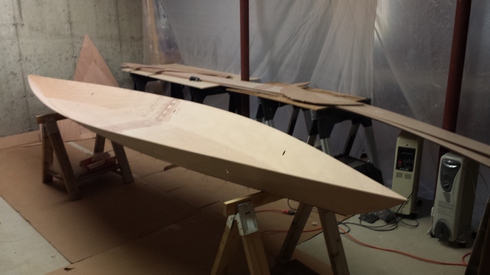
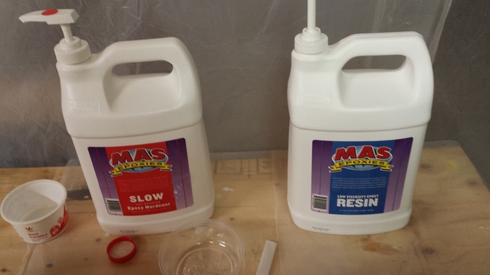
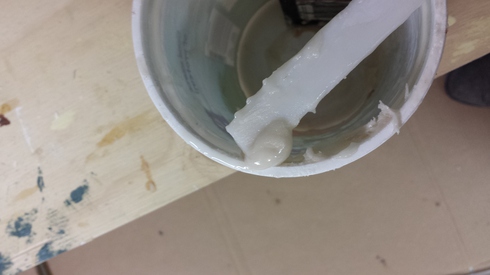
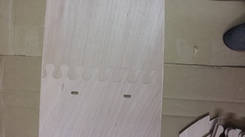
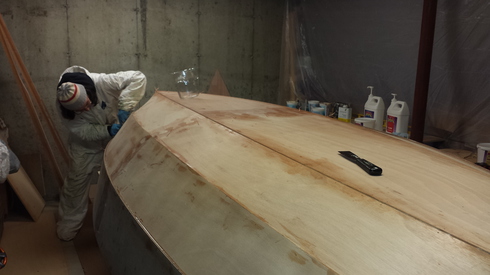
This morning, we removed the wires from the plank panels which were tacked together with epoxy filler.  Zowie, the boat did not spring apart!  The next phase is to fill in the seams with more filler.  Two different consistencies are used.  Here we see Elizabeth cleaning up after the seams have all been filled.  We use plain old alcohol on a rag to clean the epoxy drips.  The boat is beginning to take on a personality.

The folks at Chesapeake Light Craft really know their stuff.  The instructions are clear and the materials have all worked as promised even in the hands of rank amateurs.  One thing we often remark about is the fun we might have going to one of their guided boat building classes and seeing how the pros do it.  We would have the benefit of context.  As if I actually need another boat... but if I did, this one would fit nicely on the foredeck of Averisera.  Drive to Annapolis in early May and back home a week later with a new dinghy for the big boat.  Folly!  Or not...

20160130_155627.jpg

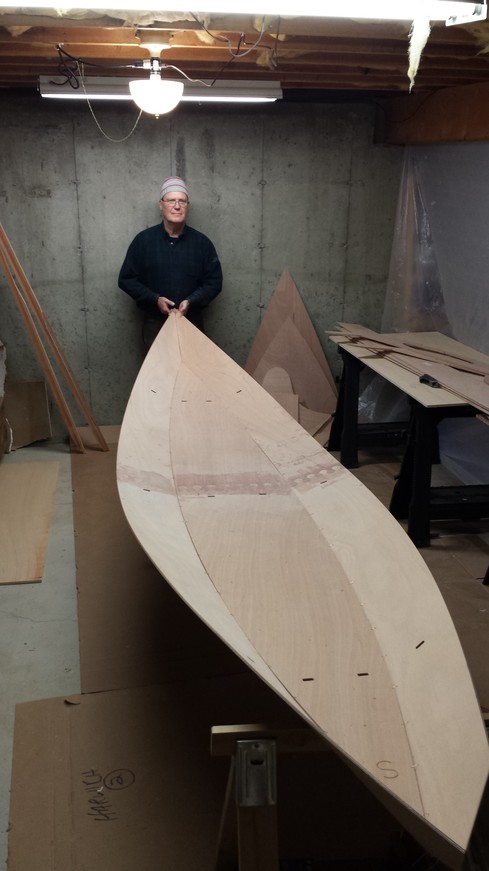
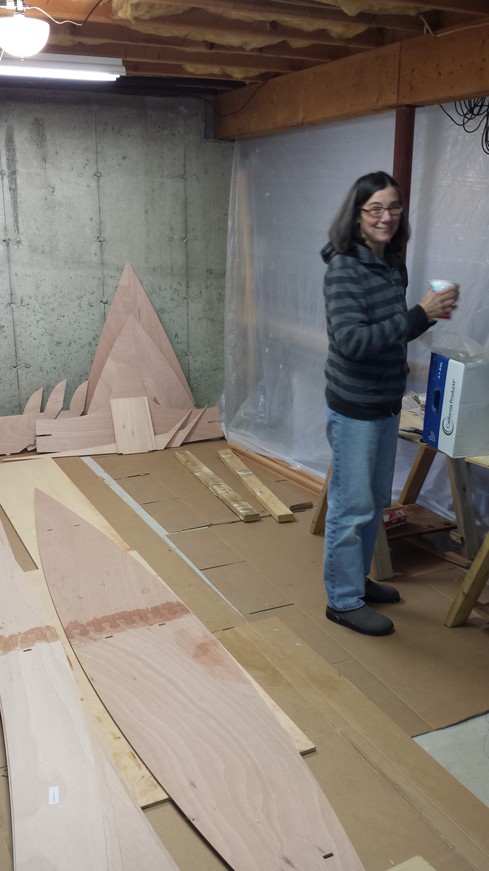
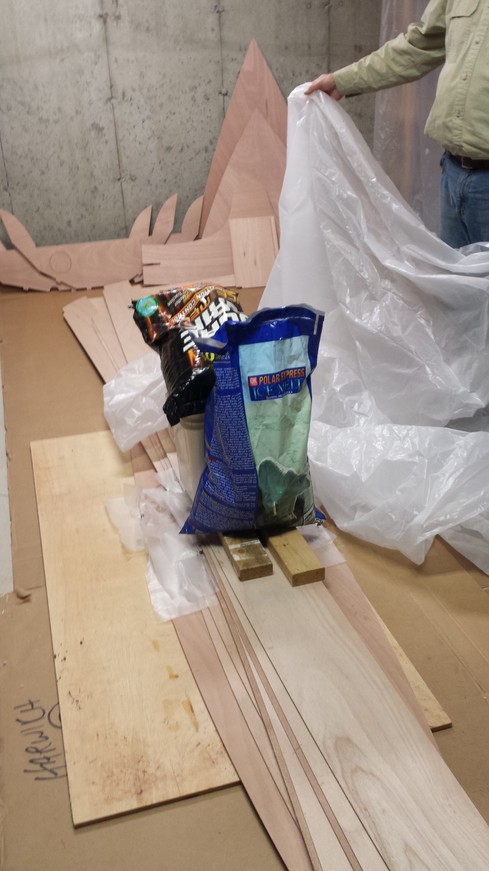
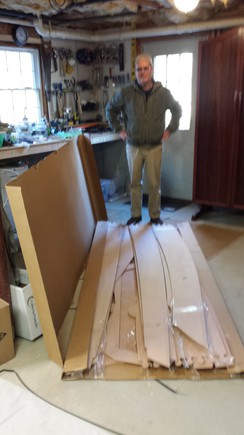
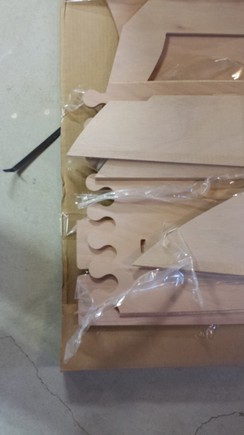
Day 1 of the project looked like this:

BoatInABox1.jpg
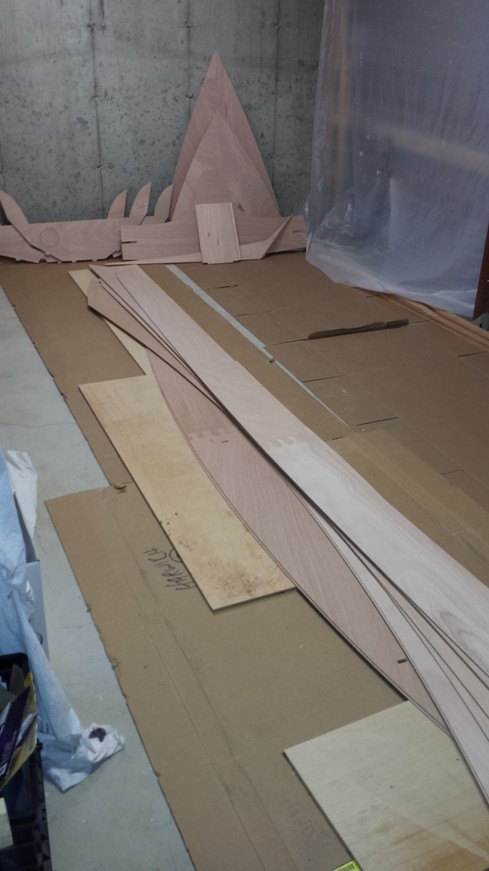
We opened up the big box, took out the parts and dry fitted a couple of the plank panels.  It looked like it would work as planned.  So far, so good.

Zeppelin - Day 10

| No Comments | No TrackBacks

This morning the basement was warm enough for us to consider doing the next step, which is to use two different mixtures of epoxy to "tack" the bottom and planks together. This sets the boat up for the next step of removing all the wire ties.


20160128_095324e.jpg20160128_095338e.jpg20160128_095346e.jpg20160128_095356e.jpg20160128_095409e.jpg20160128_095417e.jpg
These are all the seams that need to be epoxied. The mixture we made for the seam between the bottom panel and the garboard, or first side panel, was part wood filler, part silica mixed in with the epoxy mix. We thickened it and stirred until it was like peanut butter. Then with craft sticks, we pushed it into the seams all around the bottom of the boat.

The second mixture was more liquidy. We mixed up some epoxy, and then added just the silica to that. Not too much, not too little. Just right. It had to be runny enough to work in the syringe, which is what we used to fill the seams between the side panels.

20160128_112514e.jpg20160128_112504e.jpg
Filling the syringe with the epoxy mixture.

20160128_112552e.jpg20160128_112558e.jpg
This step in the process took about two hours. Not bad. It will take at least 24 hours to cure, and maybe longer, since the basement is still not all that warm.

Upside Down

| No Comments | No TrackBacks

We are building a small boat in our basement.  Not rushing, we have all winter to do it.  Yes, we lifted the boat the other day and worked it around and into the doorway out of the basement.  Plan A... check Plan A...


20160120_161003.jpg
The Skerry is now upside down and ready for the first application of epoxy tacks before removing the wire lashings.  Then, we fully epoxy all the seams, lay on some cloth, etc.

When Norm was a little kid, boats were often built and none of them as easy as stitch and glue.  Or, so he says before the boat is launched!

Winter Storm Jonas, Jan 2016

| No Comments | No TrackBacks

Lots of anticipation and quite a storm it was.  The run-up on the Weather Channel was good and we watched intently.  Went out the day before for a look-see.  Then, back out the next day to have another look.  A couple of pictures.


Before:
20160123_122620.jpg
Chatham Inlet before the storm.  The wind was really strong, certainly over 30 knots.  The lighthouse flags were set for Storm warning, a red square with a black square inside.  I couldn't hold the camera still enough to get the picture.

During:
20160124_070358.jpg
We have really nice neighbors and their house always looks pretty.  The view from our back yard.  

20160124_070613.jpg
Early Morning:  Before plowing the drive with our new John Deere 826 snow thrower. It probably saved us three hours of work in the final analysis. Thanks to the guy who sold it to us.

20160124_070857.jpg
Our Christmas Tree is a live one outdoors.  We left the lights on to amuse ourselves.

After:
20160124_103114.jpg
Gale warnings at the lighthouse.  Dramatic sky.

20160124_103049.jpg
Chatham Inlet and the breaking waves way offshore.  The inlet may have moved south and filled in a little.

We've been sitting around all weekend, since Norm had a sore back. Bending over the skerry stitching, as attractive as that is, was not in the cards for Norm. We did check out the wind at our favorite spots on Saturday.


20160116_144953.jpg
Nantucket Sound at Pleasant Road Beach. Sunlight is filtered through the clouds, sparkling on the water. Gorgeous.

20160116_153418.jpg
Gale warning up at Chatham Light.
20160116_153407.jpg
Heavy surf pounding away at the Chatham bars.

Today we spent the afternoon working on the Skerry. We made a lot of progress. It actually looks like a boat. A pretty big boat! Z has suggested Zeppelin as its name, so we can now call it Zeppelin instead of "the boat".

20160119_153646.jpg
Stitching the #3 strakes.

20160119_160317.jpg
Copper wire stitches at the stern.

20160119_160329.jpg
Stitching the strakes to the frames.

20160119_161552.jpg
Another view while stitching the strakes and frames.

20160119_161602.jpg
Each strake is stitched to the one below. Lots of copper stitches!

Well this took all afternoon. So we're stopping for the day. Let's see what happens next.

Today we did the second sanding on the finger joints. Things look pretty good there. Mostly smooth. As we were sanding, we started to notice these little holes close to the edges we would be stitching. Hmmm.  Had Chesapeake Light Craft pre-drilled all the holes? Well, yes they did! How nice :)


Norm started the planing of the stems, which need to meet at 45 degrees. He finished strake #1 left and right. We still need to plane strake #2 and 3 pieces. There is also a "gain" that needs to be tapered on two pairs of strakes. However, we couldn't wait to see what the boat might look like, with strake #1 loosely fitted to the hull bottom. And so we began to "stitch" the pieces together with copper wire, in the pre-drilled holes courtesy of CLC. What fun!

Here is the result of our labors today:
20160115_145001.jpg
Here are some pics of the copper wire stitches -
20160115_145019.jpg20160115_145027.jpgThumbnail image for 20160115_145115.jpg
The boat. I suppose we should start considering names. What do you think Z? and Marina?

After the epoxy was set from Day 5, we removed all the wax paper. You can tell the epoxy is set since it is not tacky. There were a few low spots and gaps in our joints, so we mixed another batch of thickened epoxy and put a second coat on each surface. You could tell that we got better at the spread and squeegee in our first round. The first few joints were rougher and had more gaps than the last group. So another hour playing with goop, and then wax paper separations and leave it to dry.


20160113_142337.jpg
Mixing the epoxy

20160113_142349.jpg
Finger joint after first sanding, before second filling

20160113_143050.jpg
Tomorrow, if epoxy is set, we will sand again. Next step after that is drilling all the holes for the wire stitches. :)

Today started out at 18 degrees, and the basement was pretty cold. We thought perhaps we would not be able to do any epoxy, but by this afternoon, the temp outside had warmed up to 38 and there was a light snow falling. Very pretty!


The thermometer in the basement read 58 degrees and holding steady.

Norm had already sanded and dry-fitted all the finger joints. All the pieces were laid out end to end, paired up nicely so we wouldn't wind up with mismatched strakes and whatnot.

Since this was my first time working with epoxy, we didn't take any pictures during the process. Sorry Z :-(  We did take pictures of the pile of epoxied joints after the fact.

The finger joints join the boat bottom pieces and each of 6 strake pairs, 3 strakes per side. We started with the bottom of the hull and worked our way up until all the strakes were done.

The epoxy needs to be mixed in a predefined ratio, and for the finger joints, we had to add a product called Cap-O-Sil, which thickens the epoxy to a peanut butter consistency. This we spread on the inside surface of the finger joint, and then re-fit the joints together, cleaned up the material that squeezed out, put on a clip to hold the rabbets together, and sandwiched everything in layers of wax paper.

20160112_150008.jpg
Here is what the thickened epoxy looks like.

20160112_150000.jpg
It took about an hour to spread the epoxy on the joints, squeegee it in, and stack with the wax paper. Now we wait, maybe a day or two. 58 is not very warm for curing epoxy.

20160112_145812.jpg
Some closeups of the finger joints wrapped in wax paper.

20160112_145850.jpg20160112_145923.jpg

Norm spent this day lightly sanding the finger joints on each piece. We wanted to make sure there was enough room in the joints for the thickened epoxy. After sanding he dry fit all the pieces again. Ready for epoxy tomorrow.


20160111_153445.jpg

Today Norm and I prepared the space in the basement. We set aside enough room to accommodate the 15 feet length and 4 1/2 ft width of the boat. Plus some work tables to hold things like wire and epoxy and clamps. Norm sealed off the space with drop cloths, so we can try to bring the temperature up to somewhere above 60 degrees. This way the curing time will not take forever. Maybe twice as long as a 70 degree workspace.


We have long pieces of cardboard on the floor to protect both the basement floor and the skerry.

As soon as the space was complete, Norm had to see how the bottom bow and stern fit together. Surprise! Just like a jigsaw puzzle! We balanced the bulkheads into the tabs to get an idea of what the boat will look like.

20160107_172857.jpg
Here's the full view with the bulkheads in their tabs.
20160107_172808.jpg

Two of the grandkids are reading Swallows and Amazons, and their imaginations are firing on all cylinders. Norm found a kit for building a skerry, at Chesapeake Light Craft Company. We ordered it to arrive just after Christmas, with pictures of the boat sent to the grandkids for their Christmas Stockings. The boat arrived January 6 around noonish. 20160106_105754.jpg

We had the driver put it in the garage, but then we still had to move it to the basement, where we are planning to build the boat. This was a bit tricky for us oldsters, and Norm hurt his back in the process, but the package got down the outside back stairs, and into the basement without us breaking anything (except Norm). Phew!

We still had to set up the space, and let the kit acclimate to the temp/humidity. But we did open it to see what we got! This boat uses the stitch and glue method of construction, and it comes pre-cut, and with everything we need, except tools, clamps and that sort of stuff. The pieces have interlocking parts, just like a jig-saw puzzle!

20160106_111714.jpg20160106_111931.jpg
Here's a close up of the interlocking parts.
20160106_111922.jpg
That's as far as we got on Day 1.

About this Archive

This page is an archive of entries from January 2016 listed from newest to oldest.

December 2015 is the previous archive.

February 2016 is the next archive.

Find recent content on the main index or look in the archives to find all content.

Pages

Powered by Movable Type 4.34-en